|
7/15/2018 1 Comment Splatoon Squid cookiesWhen our son chose the game Splatoon as his birthday theme this year, I just couldn’t resist making some of these adorable squid cookies!
1 Comment
Our new favorite tool! Are you tired of dropping dragees and sugar pearls when trying to place them on the cake? Those tiny edible beads can be tricky to place without poking the buttercream or fondant with your nails. Introducing the new Drageekiss bead applicator! It fits with any 4mm or 5mm pearl or dragee. Simply load them from the top and eject them out onto the cake. We even take it with us to deliveries in case we need to quickly place on beads. Be sure to make sure the trigger is pulled back all the way each time and simple give the Drageekiss a little shake if a bead hasn't loaded yet. You'll be finished in no time with this new time saving tool!
Drip cakes are not only beautiful but delicious too! Did you know that white chocolate ganache needs extra cream? Check out our recipe below to get the perfect drip every time.
The Perfect White Chocolate Ganache Drip 16 oz. white chocolate (make sure it is a real white chocolate, not a candy coating) 8 oz. heavy cream 1 TB butter (optional, makes ganache shiny even when set) Heat heavy cream and butter over heat or in microwave until simmering. Stir in white chocolate and optional coloring. For this pink color, we used a tiny amount of pink Americolor oil candy coloring. Reheat if necessary and stir until all ingredients are combined. Place ganache in a squeeze bottle and add to cake. Store leftover ganache in the fridge. Enjoy! Keep your cookie stencils organized and protected with the new stencil binder from The Cookie Countess. Find your stencils easily with perfectly sized clear pockets. You can even snap in your Stencil Genie too! Now we can finally find the stencil we need without hunting around the kitchen. We love it!
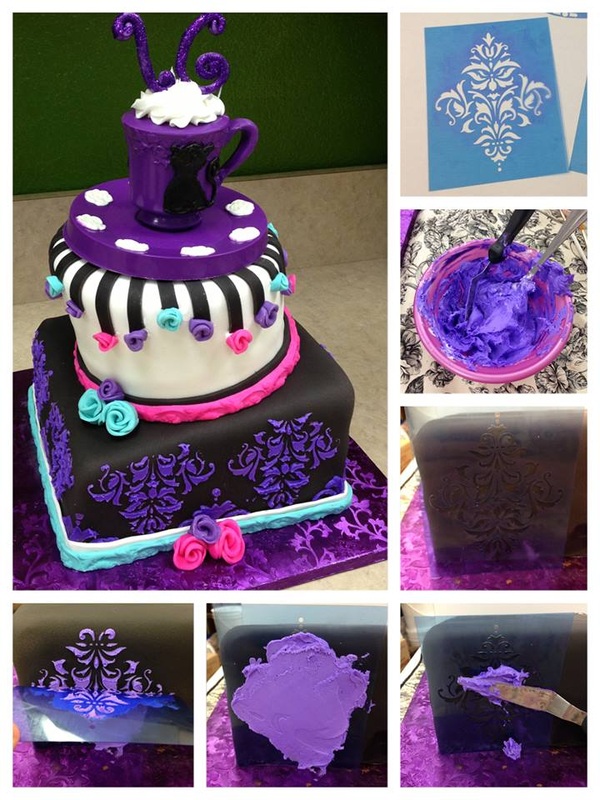
Don't have an airbrush gun? No problem! Just grab an edible marker and use it to fill in the lines of your stencil. Need to keep the stencil in place? Try using a Stencil Genie! It's our favorite cookie stencil accessory.
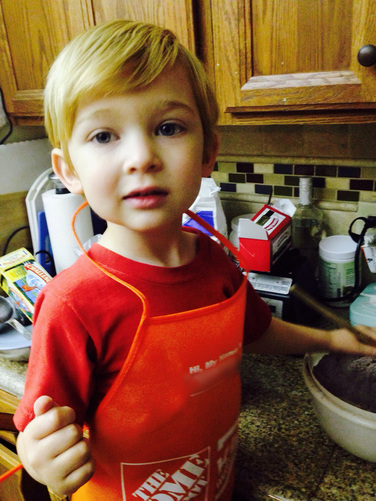
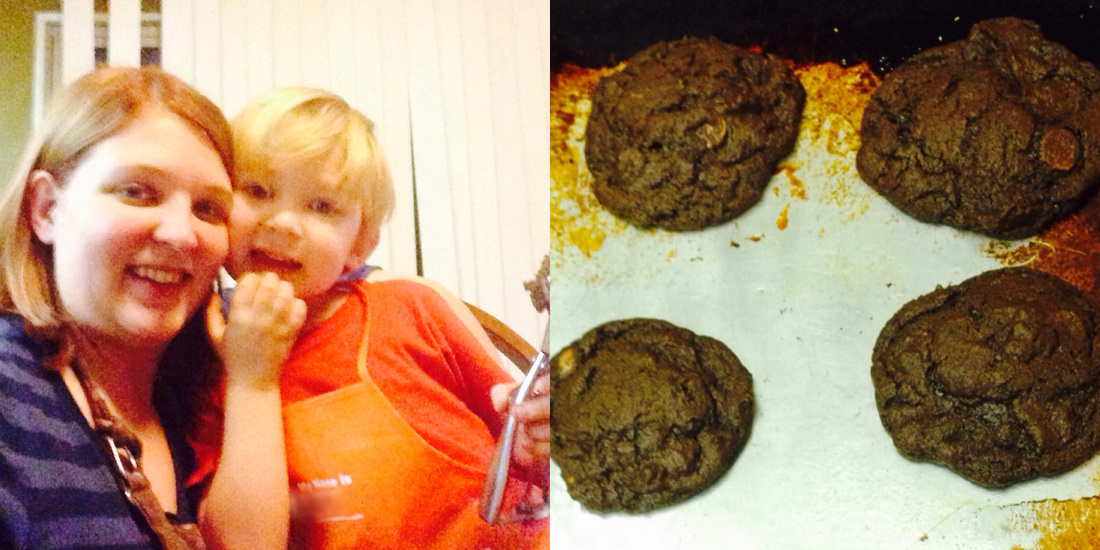
What is your ideal Christmas? Magazines, Pinterest, and TV shows fill our minds full of what our Christmas could be. How about that garland going down the staircase? That perfect centerpiece you always wanted? Those personalized monogram stockings that you tell yourself every year, this is the year? All of these things are wonderful. We all have a mental picture of our perfect Christmas. But all too often we get caught up planning our perfection and miss the magical moments in between. I have a love-hate relationship with Pinterest. Pinterest is the unlimited Hobby Lobby. You know, you walk in because you need some felt squares and end up with a shopping cart full of beautiful shiny things, 12 new projects, and an overblown budget. Take all of that, add a billion new categories, a convenient smart phone, and you find yourself on Pinterest wondering why it’s suddenly four hours later than you realized. Don’t get me wrong, there are wonderful ideas, recipes, and more. There are family friendly activities and new poses for that elf. But just like Thanksgiving, we quickly start filling up our plates full of pins until we are so full that it hurts. Not only do we say, “Let’s do this!” we start saying, “I have to make it PERFECT” because by golly it should match that beautiful picture and when I’m done I can make it into a pin of my very own. We hot glue our way to our perfect Christmas, down to the very last bit of glitter. I recently made cookies with my 4-year-old son for Thanksgiving. I found a great recipe to tweak and make my own. (I’ll give Pinterest a break, this one was on Facebook.) They are going to taste great and amazing and maybe we can even make them to sell at our shop! So I asked him, “Do you wanna help Mama make cookies when we get home?” to which he replied an astounding “YES!” So I cleaned the counters, set out all of the ingredients, pre-measured a couple of things, and pulled up the chair for him to reach. He quickly jumped up on the chair and started mixing the premixed dry ingredients. Right off the bat, some of it spills onto the counter. “Oh be careful, keep it in the bowl,” I say and wonder if this was a good idea. I grab him an apron, he’s a boy so we are limited to the Home Depot apron they give kids on craft days, and we get to work. Since making cakes is what I do for a living, I am in my business-as-usual attitude. Frankly for me, baking is the boring part you are required to do in order to have the fun decorating part later. The softened butter is going to be too hard for him to unwrap so I do it, but I have him count with me. How many sticks of butter? “1-2-3-4!” Low and behold my son is excited just by watching the butter being put in the mixer. He holds the measure cup and I help him reach in the sugar jar. Again, all giggles and smiles just watching the sugar go in the mixer. One by one, I watched how each simple mundane task made him more and more excited. By the time we started up the Kitchen Aid he was on cloud nine. He’s laughing, so I’m laughing, and there we are laughing hysterically as the paddle spins.
I never imagined this. I never expected that the simplest things would be what left us both in stitches. It was messy. It was unorganized. It wasn’t one of those snapshot greeting card moments. It was me and my son standing around a cocoa powdered mixer and a counter full of spilled flour and broken eggshells. And it was PERFECT! I have to admit, I had a mom moment later on. After helping him scoop dough for the first round of cookie sheets, I started just scooping the rest. He quickly reminded me that he gets to help too. I relented thinking of that magical mixing moment. I could’ve had the perfect cookies. I could have saved time. Those cookies would be mixed and ready in less than 10 minutes. I would’ve scooped each dough ball to be exactly 2 Tablespoons. I could have had that award winning photograph of my perfect cookie recipe. It would be pinned for all the world to see. I would have...missed everything. We sacrifice those happy memories for our own idea of perfection. We all do it. How many times have we fixed our kid’s mistakes? “You did such a great job, but that sticker should be over here.” How many times have we obsessed over cleaning up that spilled glitter before they are done gluing? How many times do we over schedule ourselves for the sake of becoming the next Martha Stewart, Donna Reed, Super Mom? In the words of that now infamous movie that the kids won’t stop singing, let it go. Let go of what your idea of perfect is and see what perfection looks like through the eyes of your children. Take a deep breath and be in the moment. Put down the phone and turn the Christmas carols up. Watch them light up. Laugh with them. Enjoy every moment, because we only get so many years of perfectly messy memories. 11/4/2014 2 Comments Pumpkin Spice Chex MixIt's time to celebrate our cooler weather with some festive fall treats!
You will need: 1 box Cinnamon Chex 1 box Spice Cake Mix (any brand) 1-2 12 oz. bags Clasen Pumpkin Pie Chocolates Melt the chocolate in the microwave in 15-20 second intervals until melted. Make sure to stir the bowl after each round. In a large mixing bowl (or gallon freezer bags for less clean up) combine Chex, cake mix, and chocolate. Stir to combine, then ENJOY!!! Too much spice for you? Try using a box of yellow cake mix instead. 10/15/2014 4 Comments Back to Basics: How to use a CouplerRecently on our Facebook page as part of our Tuesday Tips feature, we went back to the basics of cake decorating with a quick and easy guide to using a coupler. Here's how we did it: Directions
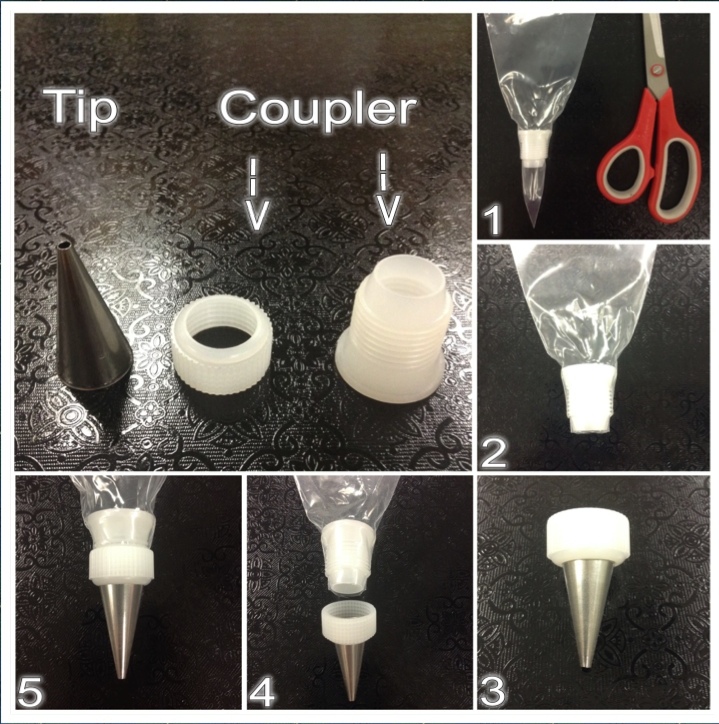
A coupler comes in two pieces: a larger tube-like piece and a smaller, thin ring piece. The ring piece is meant to screw around the tube piece, but to get started, you'll want to unscrew the coupler so that the pieces are separate. You will also need a pastry bag, a tip, and a pair of scissors. Step 1: Take the tube part of your coupler and insert it into your pastry bag, pushing it as far down as it will go as pictured in Photo #1. Step 2: Take your scissors and cut off the tip of your pastry bag so that the opening is cut flesh with the tip of your tube piece. See Photo #2. Step 3: Switching over to your other items, take your pastry tip and insert it in to the ring piece of your coupler, as shown in Photo #3. Step 4: Finally, as demonstrated in Photos #4 & #5, line up the ring piece, with tip still inserted, at the opening of your pastry bag and screw it in place on the tube-like piece of your coupler. You have now successfully put together a coupler and are ready to pipe away! Bonus Tip: Did you know that you don't always need a coupler? That's right! The main point of a coupler is to allow you to switch tips on the same pastry bag while working. If, however, you only need to use the same tip the entire you're working with your pastry bag, you won't need to use a coupler. Simply insert the tip into your pastry bag, cut the tip of the bag off, fill with frosting, and set to work! |
Kilted Blog
Here is where we like to share our knowledge and love of decorating with you! Keep checking to see what's new, recipes, decorating ideas, and more. Archives
July 2018
Categories |


 RSS Feed